Saturday, June 21, 2014

Bra Flaws: Trim on Moulded Cups

This is a 2 part post. The first involves Freya Deco Taylor Plunge in Jet. The second involves Freya Deco Spotlight Plunge in Claret. I appologize but this may be lengthy.

PART 1
The Taylor:
I had actually emailed Freya about this on 11/28/13 and they responded 12/03/13 with, "Thank you for your e-mail. I have passed this onto our Design Team and we will be in touch shortly." Over 6 months have passed and I'm still waiting for that reply. As many people know who own this bra, it's not really seamless. A seamless bra offers just that - No Seams. I realize this was a special attribute of the bra, but it could have been delivered better.

So what's the problem? This:

Before (left) and after (right), taken on the same day from this past November. Look at the difference in size removing the trim has done! The cup now has ease both above the apex and along the edge. I wish I had a shot of what this looked like under clothing. You can see the ridges in the trim on the left, it was much more exaggerated with a shirt on.


Freya has decided based on the feedback from many of its customers that there needs to be some kind of a trim to keep the edge of Deco from tilting out. For these customers Deco runs too large. But this is not the bra's fault. It has to do with the shape of the woman wearing it. If you fit great in Freya's seamed, unlined bras, then do not even bother with Deco. Deco is, or was, targeted to a specific audience of women with rounded boobs. Full On Top. The trim that they started adding to Deco (which actually started with the Carly from SS2011) has proven to be not only quite visible through clothing, but also problematic when it comes to having the bra fit with a smooth line. Add to this that the shape and size of foam used in ALL of these trimmed bras is shorter than the original Deco, AND it's pointy? Who makes a foam cup with a point moulded in?? Ok...it's a subtly rounded point, BUT IT'S STILL A POINT!

There are 2 different types of trim. One is detailed with ribbons and lace, the other is a tape that's folded over the edge and then stitched through. Both are very bulky. The ribbon/lace version is stitched to the cup too far below the edge which results in a curl (see previous post, this would be along the lines of reason 1b.) and also much less ease in the top portion of the cup. The tape version is just too thick, and with all of the zig-zag stitching on top of it...it's very hard, there is no ease at all...and I just cannot understand why a design team thinks it's a good idea to remove ease from a fabric that allows for it in order to fit correctly. Why don't you just put a full lining, zippers and darts in a dress made of jersey knit fabric?

Fixing It:
The fix for Taylor involves nothing more than a seam ripper and a pair of scissors. But you suffer the loss of the trim on the cups. Actually...I like it better without the trim! It will take a couple of wears to remove the indentations left from the stitching, but you will be left with a true t-shirt bra and you'll be able to wear it with anything and not worry about a gross VBL.
  1. Starting on the inside of the cup, remove all the stitches holding the trim in place, getting as close to the end as you can. There are 2 rows for this particular bra holding the velvet ribbon down.
  2. After the thread is removed, carefully cut as close to the edges as possible. This is just a lot easier and less invasive than taking apart the center gore and bonded side elastic. And you're done!

Something else that really bugged me when I was removing the trim wasn't the fact that it was on there in the first place and compressing the cup. These next issues had to do with quality.

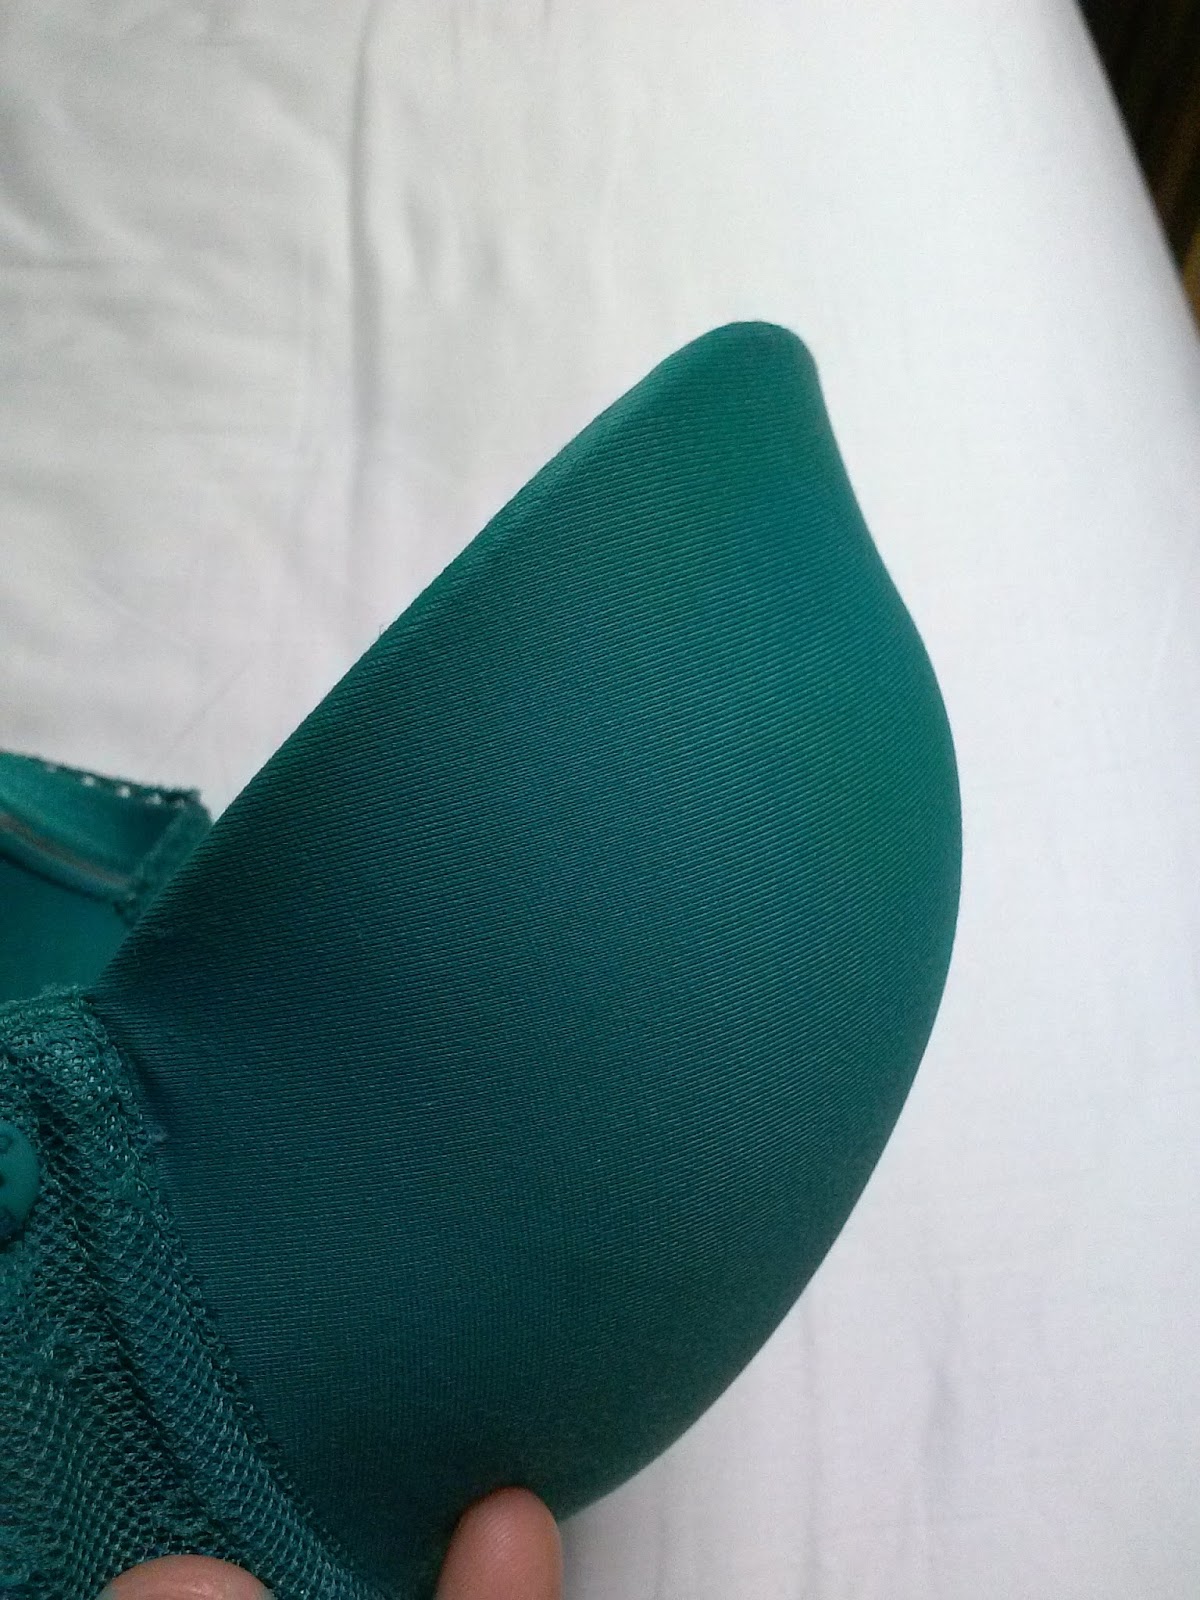
I don't know why they did this or how it passed. This photo and the one below show the cups folded in half. The right cup (what would be the right when wearing the bra) was 3/8" shorter than the left. Just to make sure it wasn't because the bra was folded in half from one way, I did it to the other side folding it opposite. The right cup was still 3/8" shorter!

Look, you can't even see the right cup beyond the left one that's on top!
 

Here you can see just how much compression resulted from having the trim stitched so tightly on.

And because it was stitched so tight, these are just the indentations from the thread. I had already removed the trim. Additionally, there were sections along the stitching line that had several pieces of thread in them. Almost as if the machine had run out of thread and they rethreaded it with 2" of thread, only to run out again. This caused the majority of negative ease because you had sections with 3 lines of stitching in one little area, and as you can see this was more of a problem in the right cup, the thread channels are deeper. You don't do that! You just don't!
 
 
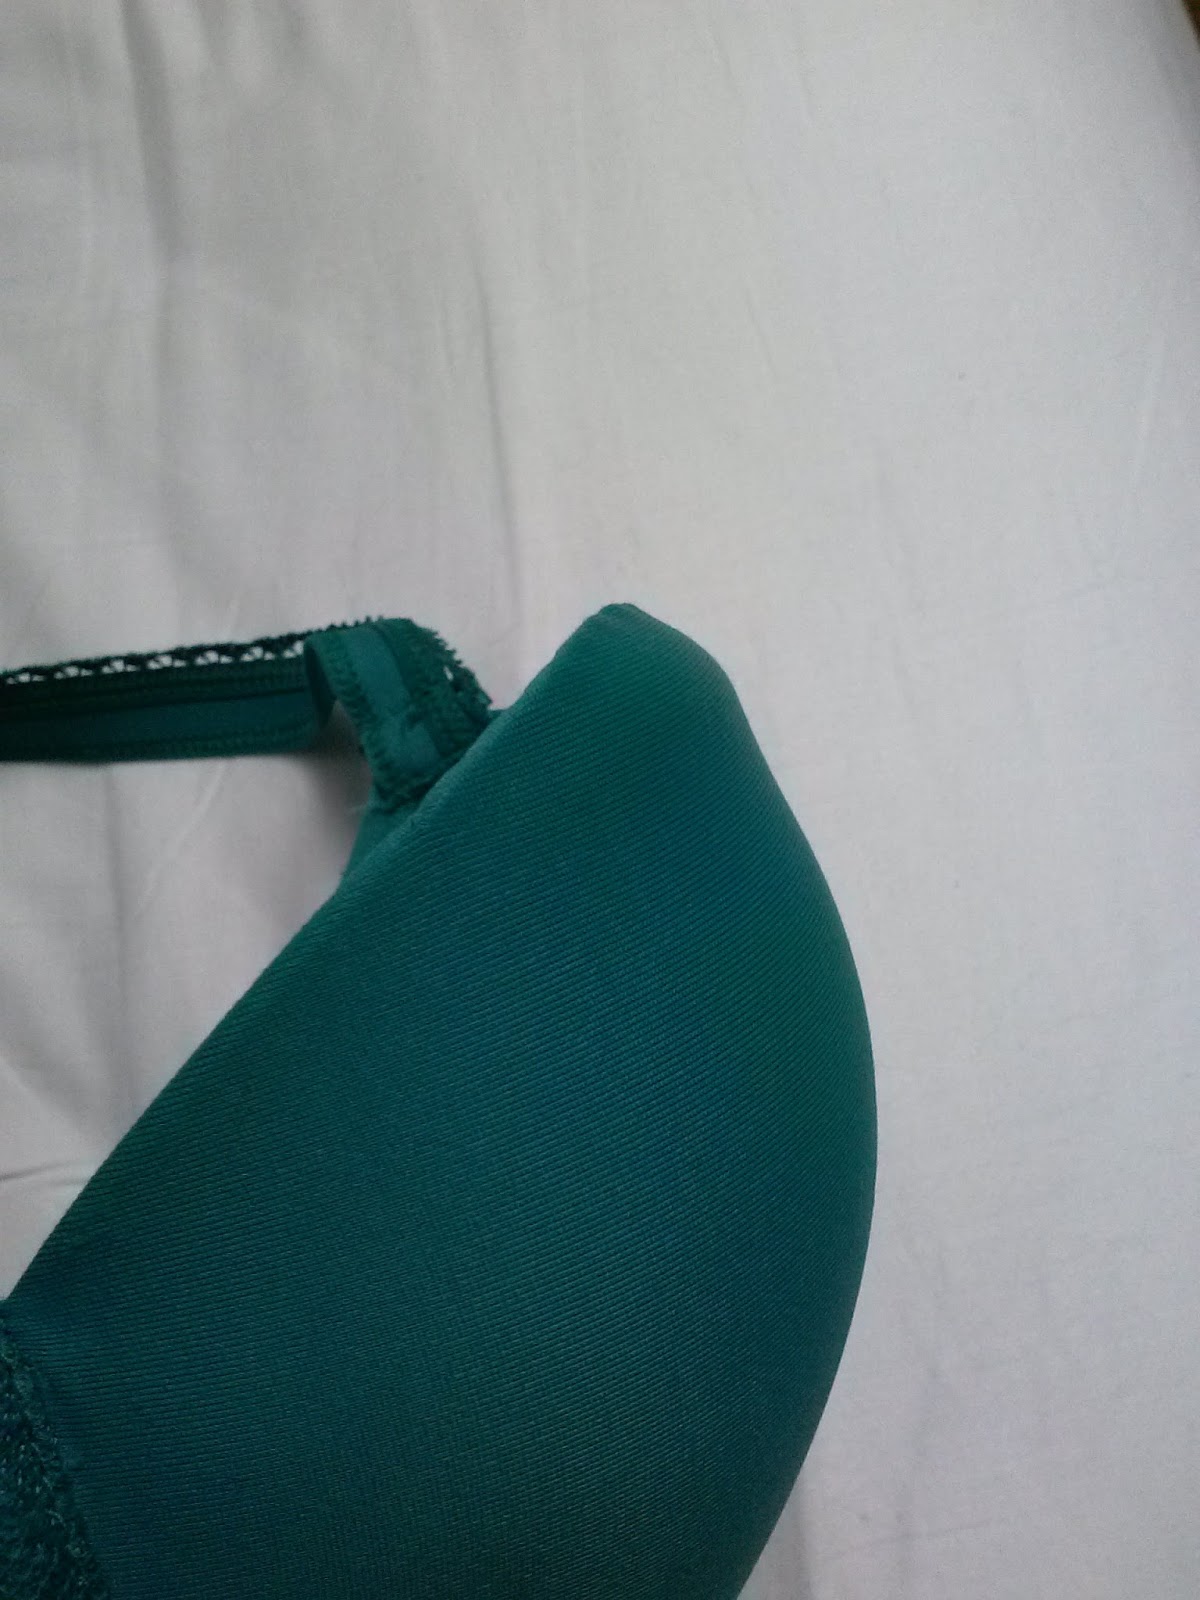
After removing the trim, I tested the cups again to see if they were different sizes. Guess what? They weren't!! So why were they before? Well! Someone thought it would be hilarious if they used trims that were different sizes! I cut each trim off evenly from both cups but the one that was from the right cup measured 7-3/4" while the trim from the left cup measured 8-1/2". Almost an entire inch was missing from the trim attached to the right cup. This caused the cup to also curl out more because the trim was gathering the foam and giving it a fluted edge.
 
What this will look like after:
Taken on the same day. You can see how much negative ease was in place from the trim being on. In the top it's holding me down and (not noticeable but I remember clearly) pushing me out to the sides and causing the wires to sit on tissue, whereas the second shot shows me more front and center.

A complete after! And a smooth line! THIS is how I want my Deco's to fit. In the second shot here you'll notice the gore/band is a little higher up. I had to add a dart to the gore because the cups on all their trimmed bras and those in the Honey range use a shorter foam cup with less depth. Adding this gore provided more depth because it tiltled the bottom to come up higher. Without this dart I was getting indents next to the gore because my boobs were pressing down on the apex, there wasn't enough room so the result is quad-boob (ever so slightly noticeable in the first shot on my left breast).
 
I mentioned to Freya that perhaps they could come up with another line within the Deco Range. A cup that fits those who are full on top or just full all around, with center pull straps and higher sides, a narrower gore that's also a little taller, more room in the bottom of the cup with a foam that is moulded to a more naturally round shape. There are plenty of us out there who fit this bill. Then keep the Decos that have trim and the other one that's so heavily padded you could use it as a memory foam pillow (or a floatation device?) for those who are bottom heavy or smaller busted. As of now, in my book, Freya only caters to 1 shape. And I'm not it.


PART 2
The Spotlight: I thought this bra was cute. Until I got it in the mail. While the underwear feels a lot softer and a lot more flimsy (so glad I got them on sale, they're not worth a $29 price tag), the bra feels like you could use it as kevlar armor.
 
The problem with this bra is the trim, the shape and the fact that it was over starched.
 
First the trim:
Just stop it already! It's itchy, it's rigid, it's visible.
 
The shape:
Who has boobs shaped like this?


A foam moulded cup should maintain a natural round shape. Not one that is flat on the sides and bottoms with a severe inward taper at the top of the cup. And I certainly do not want my boobs to be moulded into this kind of shape, it's just hideous.
 
The starch:
No! You don't need to starch a moulded bra. I've worn and washed mine several times already and I cannot get this crap out!! I would soak it in fabric softener or even conditioner, but the straps on this bra are so ridiculously flimsy and will stretch out easily that I'm not even going to both tampering with this cardboard effect for the sake of keeping some amount of elastic in this.
 
My fix:
An iron. I used a middle heat setting; mine goes from 0-6, with 4-6 being steam, I had it on 4. And a moderately thick towel. Start with the inside to relax the cup. Hold the iron on for about 8 seconds giving each second a quick burst of steam.


This is how you'll be pressing them flat, and with a towel over the cup. The first one is done from the inside and you just want to go over as much of the cup as you can. The second one is done on the outside and you'll be pressing all along the edge to flatten it and relax it a bit. Quickly reshape the foam after each press, stretching it in the way you want it. If you don't do it right away you can end up with some wrinkles/indents in the foam. These will go away with wash and wear. (You'll see some indents in some of my shots.)
 
 
And now for some before and afters:
Before: Really, strangely tall and pointy.

 After: Relaxed. I'll mould it myself, thank you very much.


Before: Ski slope is all the rage in the UK I guess...

After: Smooth lines are more attractive here in the US.


Before: Can't...find...any...room! Nowhere...to...go!!

After: Ahhh...


Before: Why, Hello there. I'm related to the Blockheads from Gumby. Except it's not my head that's blocky, it's my boobs. (Top of my left boob. Sorry the quality is bad. This looked worse in person, trust me!)

After: Hey, look! I have a new bra I can wear and not feel uncomfortably noticeable and awkwardly shaped in!
 
 
I may one of these days remove the black trim along the top of the cup if it still poses a problem, but the act of pressing this with heat and steam flattened the edge so you didn't see it as bad - also, I know I mentioned the trim shows through shirts and you couldn't really see it in this top because of the lighting and the angle, but believe me it was there. After wearing this for the evening, I didn't notice the starch quite as much as previous wears. I still have an issue with the sides of the cup where it meets the straps. They dig in and there really isn't much I can do about that except for move the position of the straps. Unfortunately that will not be an option for me because the cups already fit good. When you do that you have to take out almost an inch from the sides, depending on how far you need them in...some might be able to get away with just half an inch. But when you do that you take out that much more depth from the cup...and I kind of need it. I may perhaps add a piece of cloth or soft fleece felt.
 
 
Other bras from Freya that would benefit from an iron and a seam ripper:
Ashlee
Carly
Charm
Crystal
Deco Cobalt
Deco Delight
Deco Lagoon
Deco Shape
Flamingo
Honey Topaz
And just about all the others they will be making in the future. It seems they're steering clear of the previous Deco shape that fit so many women wonderfully. All of the above mentioned bras have the new Deco shape which is a shorter cup with less depth, and a severe curve just above the apex that tapers in.
 
It's not just these little design elements that get me, it's also the quality. If a bra has a QC sticker, that means it was inspected and thought to be worthy of selling. Yet many flaws get past this process and are deemed acceptable for profit. I have an issue with that...!

Saturday, June 14, 2014

Bra Flaws: How To Uncurl a Curling Cup

Edit: the photo order and descriptions have been adjusted. Hopefully Google will keep it that way this time.

One of the reasons I buy Freya is not just for their somewhat extended size range and the availability of a t-shirt bra that fits a natural tall, wide root in a 28. It's also for their somewhat better quality. I'm not going to find the same type of durability or size that fits from a bra bought at Victoria's Secret, Target or Walmart - or any American brand for that matter. Sometimes...even Freya falls short on their own quality. Perhaps their QC team is made up of a bunch of monkeys, or 5 year olds, or disgruntled sweatshop workers...or all of the above? I don't know. But if I'm paying $60+ for a piece of underwear that has a tag loaded with those wretched QC stickers that leave residue to prove they've been inspected then I expect something decent.

That being said...last year I ordered the last of Freya's "original" shaped Deco bra: Deco Honey Plunge in Jade. (Currently they are making them all with an overstarched trim that only fits women with short, narrow roots which was their only target audience with all of their other bras. The original Deco design does not have trim.) Upon receiving it in the mail I noticed one of the cups was badly deformed. Having to avoid shipping it back and waiting close to a month I kept it and figured maybe it'd work itself out. Not only that but I ordered a larger cup size because my others were getting small. Then I lost weight. Then I gained the weight back so now I can wear it again. I had it on yesterday and Luke noticed the flaw, "If I can notice it then it must be bad!". Yes, thank you!

I searched online for a fix. The most popular result, and pretty much the only one, was to iron it with a cloth to protect the fabric. I actually tried that when I first got this but it only lasts through 1 wear, and eventually the cup refolds.

Why does this happen? A couple of reasons:
  1. Shoddy workmanship!
    a) The main fabric has not been cut correctly, usually because it's too short for the foam so it has to stretch over the top of the foam cup and this causes it to pull the moulding out and down. - or
    b) When stitching the main fabric to the moulding, either one of them could have been pulled too much in the process resulting in the fabric being stretched and the thread in the stitches actually keeps this shape.
  2. The bra is old and has stretched out - except this would most likely happen equally to some degree in both cups.
  3. The bra has been man-handled in the wash, and/or put in the dryer. Don't put them in the washing machine, unless you're careful. (See my update below) And always line dry them letting them hang from the center gore so neither the straps nor band can get stretched out in the drying process.
So why did it happen to mine? Reason 1a. There is a super quick and easy fix for this that involves chalk, thread, a thin needle, and a pair of scissors. Below are photos, pretty self explanatory but I'll briefly describe them as needed.

Yuck!

I paid $60 for this nonsense...

Shame on you, Freya!

Unsightly edges under clothes.


Cup appears too big because of the curl.

On the inside of the bra, mark the bottom of the curl with chalk, extending toward cup edges a little ways past the majority of the curling. This line will be where you insert the needle.

Use a double strand of thread. If you want more security you may wax it first. 

Beginning at the outer side of cup (strap side), insert your needle into the cup lining where you've marked it. DO NOT penetrate all the way through the foam! You may go through a little of the foam but not all the way, and definitely not through to the outside of the cup. Your second pass will be at the top of the cup. Same with this, do not go all the way through. You just want to catch a little bit of foam here. The idea is to pull the top back down. Stitches should be no more than 1cm apart.

DO NOT PULL THE THREAD TIGHT! One commenter on here said this fix did not work for their bra, and instead made it worse. If you pull the thread to tight it will create curling in the opposite direction. You only want to pull it as tight as to help the foam to lay smooth. Take your time, and check the foam after every stitch or so to make sure it's keeping a normal shape.

After completion. 

Completed.

Completed. It still appears there is a bump in the two photos above but now the other way. If you're in the correct cup size this will go away while being worn.

Much better!

This is what a t-shirt bra should look like under a t-shirt.


Update 12-29-18: mine is still holding up very well, and I carefully wash all of my bras in the machine, regular cycle, cool to warm water, in lingerie bags, line dry only. I haven't had a problem with the integrity of them, and the hand sewing on this one still looks like new. I wear this bra quite often too.

This is what my stitching looks like after 4.5 years. As you can see it's still intact. The threads have stretched a little but the foam is completely smooth. This is without waxing the thread. (And yes it does still fit  😄 I keep a very consistent weight and shape.)

Nice close up to show the integrity, and also how much fabric is really being held by thread.

Tuesday, January 21, 2014

List - Update/Addition

I managed to complete 22 projects last year. That's 2 less than the year previous...but in my defense I had a crap load of work that took up most of my time. Some projects were removed from the list, some were added. Altogether by the end there were 26 for Sewing, 20 for Knitting, and 1 for other, 47 total.

I've completed 12 from Sewing and 10 from Knitting. Almost half! Which is amazing for me! So below is the new list for 2014 with current projects, and again, those to come will be added as needed. Hopefully I can get this down to just a few at a time......Ha!

Completed:
01/2014 - Knitting = 3
02/2014 - Knitting = 2, Sewing = 1
03/2014 - Sewing = 1
04/2014 - 
05/2014 - 
06/2014 - Knitting = 3
07/2014 - Sewing = 2, Other = 1
08/2014 - 
09/2014 - Knitting = 2, Other = 1
10/2014 - Knitting = 1
11/2014 - Sewing = 4, Knitting = 1


Sewing:
Asian print wrap dress - mod to wrap skirt
Green floral print skirt - mod to...haven't decided
Shape FX dress - alter
Tahari dress - alter/mod
Luke's combat vest
Black Asian print skirt
Red Asian print skirt
Domino swimsuit
Red swimsuit
Bridgette thong - mod from basque remnants
Rainbow quilt - topstitch
Bambi's (Oma) embroidered pillow
Blue pleated dress
Gray/Orange Kimono
Linen pencil skirt
Asymmetrical shell
His and Hers matching Star Wars PJ's (2)

Knitting:
Corsica sweater - frog/reknit
70 yard mitts
Green Gable hoodie - frog/reknit
Striped V-neck pullover - frog/reknit
Jaywalker socks
Kitten mittens
Drop Stitch Infinity Scarf
Turquoise hat
Yellow hat
Gray vest - frog to...haven't decided
Diagonal pattern baby blanket for Nevi
U-neck pullover - frog/reknit to Featherweight Cardigan II
Tree Jacket - frog/reknit
Woodland Friends
Wolfie hat
Rocky Coast Cardigan
Bulkyweight Cardigan
Sportweight Cardigan
Anchor Cardigan


Other:
Dress form
Asymmetrical Shell pattern
Anchor Cardigan pattern
Glass buttons

Saturday, February 2, 2013

High Seas

Ok, I have to share this even if it's already double linked in my List post. This is the High Seas shawl pattern by Kieran Foley. He's got some pretty awesome designs! (Camino Waves anyone? Yeah, I've got a water thing...)


For Amanda =) I'll get model shots soon.

(Oops...in way too much pain, had to stay home from the Assembly. Too bad they didn't have a tie-in line.)

Friday, January 11, 2013

List

Last year I put together a list (and bin) of all the projects I had. I was thinking there were maybe 10-20. It piled up to 69! That's not including any jobs I had either, just my stuff. 24 of those have been completed in 2012. This year I plan on finishing the list off. Or trying to at least. So here is that list. As I go through I'll be striking off or linking what's done. What doesn't have notes next to it needs to be made. And if I come across other projects they will be added.

Sewing:
Asian print wrap dress - mod to wrap skirt
Green floral print skirt - mod to...haven't decided
Shape FX dress - alter
Tahari dress - alter/mod
Orange dress - mod to t-shirt
Luke's combat vest
Black Asian print shirt
Red Asian print shirt
Brown wool skirt
Domino swimsuit
Red swimsuit
Bridgette thong - mod from basque remnants
Winter quilt - topstitch
Rainbow quilt - topstitch
Bambi's (Oma) embroidered pillow
H&M dress - alter
Summer halter dress - mod to shoulder straps
Luke's Fabulous reversible bathrobe
Monogrammed handkerchiefs
Vigoss jeans - alter
Illusion skirt
Blue floral dress
Gray/Orange floral dress
Cat print top
Shark print top
Plaid button-down


Knitting:
Corsica sweater - frog/reknit
Turtleneck tunic - reknit to Helix cable vest
FK textured tunic - reknit to Telemark Legwarmers
Matching hat for legwarmers
70 yard mitts
Burnished tunic - frog/reknit
Green Gable hoodie - frog/reknit
Luke's Leo sweater - reknit to cabled cardigan
Amanda's High Seas Shawl (also on Ravelry)
Pointelle socks
Jaywalker socks
Kitten mittens
Textured cowl
Turquoise neckwarmer
Turquoise hat
Yellow hat
Gray vest - frog to...haven't decided
Featherweight cardigan
Gnarled Oak cardigan
Diagonal pattern baby blanket for Nevi


Other:
Dress form

Monday, October 1, 2012

Freya Patsy Demi bra

It's called a Padded Half-Cup normally, but this is really a Demi since it covers above the apex by about 1.5", more or less depending on size but the apex is clearly visible if you look at the cups from the side when not worn. Demi is cut straight across for a more corset look in that it showcases the upper bust, whereas a half-cup is just that, not an everday bra because there usually is no nipple coverage. Also...this thing is not padded. The ever so thin lining is almost like a super thin quilt batting. It's about 1/16" thick at most and if you compress it between your fingers it's as thin as two layers of thin fabric put together - and with a correct fitting cup your boobs actually compress the fabric. When it's too loose there is no compression and the bra will stick out more. If you're getting a size boost from this, or any lined bra for that matter, then your cup is too large.
 
Something else to note: Demi bras are better suited to shallower breasts, so if you're fuller on top or you have a bit of volume these are not going to fit you. Some websites say these are suited for A-B cups...if you're familiar with Freya they barely have any bras starting in C, nevermind B. This is a shape specific style, NOT size!
 
 
Another alteration from a 30F to 26G. I managed to do this in about an hours time. Same alteration I did to the Freya Daphne, though I think this one came out better. The fabrics are different so this one has better stretch but without getting too tight feeling. Finished measurements are 22" unstretched, 26.5" stretched...and with room for a couple of fingers. Before it was 25.5"/30".

Update 2/04/13: Booo...this no longer fits good! I could really go up a cup size and as of now am no longer suited to Demi's because of remigration =( The only thing that could possibly fix this now is if I can manage to find longer and very narrow wires so it changes the shape of the cup some. Same goes for the Daphne.


I also, finally, put a dart in the center gore of my Panache Cleo Sadie....waaaaaaayyyy better fit. I've done this to bras in the past, some it works with, others it doesn't. This bra was a good one for it because of the way it's constructed and the shape of the cups. Normally the vertical seams kind of point away towards the sides and then in /   \ kind of like that. I took off about 1" of the band with the dart and now the seams point more like this \  /, though slightly straighter, so it gives better lift and support from the bottom of the cup rather than just smooshing you down.


Mods I have left to do for underwear include taking in the band or at least minimizing the stretch in the Freya Edina Longline, turning the Panache Cleo Jude from a partial band plunge to a full band balconette/plunge, taking in the band and center gore of the Panache Porcelain (this one I have in 30F because 28F didn't fit and I thought at the time 30 would be the sollution when I should have gone for 28FF), and I may also turn that bra into a full band style...I haven't decided yet. I still have a thong to make for the Fantasie Bridgette Basque turned Longline too.

Underbust Corset

It's finally done!!! Hip hip hooray! I got my steel busk in last week, $6.50 including shipping, all the way from China. Seriously...get your corset stuff on Etsy! I found the same product elsewhere and they wanted over $30 including shipping.

This pattern is from Laughing Moon Mercantile, #113. I did view A (Ribbon Corset). The ribbons are cut on angles, and varying degress so it mocks the curve that normal cuts of several pieces of fabric would do. The fit is pretty spot on. The only thing I don't care for is how far apart the grommets are (I used eyelets). But if you look at the back photos for this they're pretty much the same on the pattern envelope as they are on me. I made the size 8 (26-24-34), although my actual measurments are slightly different from that (the bottom of the corset is not at full hip, it's at the very top of your hips...and unfortunately I have an uber long torso so this sits a little higher up on me than it's supposed to). Basically, just go with your waist measurement. What I love about this pattern is it's so detailed. Every little step, plus inbetween, there are instructions. So much better than the crap that McCall's, Simplicity and all the others put out. It's a very easy corset, all you need to know how to do is sew, measure accurately and be able to install grommets/eyelets, boning and a busk. Those last two were my first try and they came out almost perfect. (I had to readjust the seam allowance for the nubby part of the busk because there was a visible 1/8" space between the front. And the eyelets...well I used the hammer method, so yeah.)

For the fabric I used just a black heavy twill for the inside and the outside is brocade. Too bad they're in small sections because this fabric is gorgeous! (And I rarely use that word.) The ribbons are just your standard stuff, twelve 6.5" lengths of 1/4" featherweight plastic boning, 9" steel busk with a white coating (coating is on inside only) and 6mm eyelets.


^ The inside ^


=D